

Canva Magic Media is an AI-powered suite inside Canva that lets you generate images, videos, and design elements directly within your project. To use it, open any Canva design, click “Apps” in the left sidebar, search for Magic Media, type your prompt, and generate. The whole thing takes under two minutes.
Table of Contents
What Is Canva Magic Media and Why Should Creators Care?
Canva Magic Media is Canva’s built-in AI generation tool that creates images and videos from text prompts without ever leaving your design canvas. For social media creators, it means no more switching between apps to find visuals. You prompt, generate, and place in one workflow.
I’ll be honest with you when Canva first started rolling out AI features, I was skeptical.
Canva has always been the “easy” design tool. Great for beginners, a bit limiting for professionals. So when they started adding AI under the “Magic” branding — and specifically when I first heard about how to use Canva Magic Media for visuals — my first instinct was that it would be surface-level and gimmicky.
I was wrong.
After spending serious time with Canva’s Magic suite Magic Media, Magic Design, Magic Write, Magic Eraser — I’ve come to realize that Canva AI has quietly built something genuinely useful for content creators who need to move fast without sacrificing quality.
If you’re a social media manager publishing five to ten posts a week, a blogger creating custom graphics for every article, or a YouTuber designing thumbnails at scale — Canva Magic Media is worth understanding properly. And if you’re comparing it against dedicated image generation tools at the same time, my full breakdown of the best AI image generation tools for creators in 2026 will give you that bigger picture. Not just the surface-level “click and generate” part, but the workflows that actually save time.
According to Canva’s own design trends report, over 95% of Canva’s active users now interact with at least one AI-powered feature monthly — which tells you something about how central the Magic suite has become to the platform’s direction.
This guide is the exact resource I wish existed when I started. Everything you need to know about how to use Canva Magic Media — and all the Magic tools around it — step by step, from scratch.
How Do You Access Canva Magic Media for Free?
Learning how to use Canva Magic Media for free is straightforward — the tool is available on the free plan with a limited credit allowance of roughly 50 lifetime generations. Canva Pro users get 500 monthly credits that reset. You access it through the Apps panel on the left sidebar of any Canva design, or via the “Generate Image” button inside the editor.
Canva for free gives you access to Magic Media, but with a credit limit.
Here’s exactly where to find it:
Option 1 — Through the Apps Panel: Open any design in Canva. On the left sidebar, click “Apps.” In the search bar, type “Magic Media.” Click the app. The generation panel opens on the left side of your screen.
Option 2 — Through the Editor Directly: Inside a design, click on any empty area or image placeholder. You’ll see a “Generate Image” button appear in the toolbar. Click it. Same panel, slightly faster to reach.
Option 3 — Through the Elements Tab: Click “Elements” in the left sidebar, then scroll down to the “AI Image Generator” section. Same tool, third entry point.
One thing worth knowing: Canva Pro’s 500 monthly credits cover both image and video generation. Video generations cost more credits than image generations — roughly 5 credits per image, 20 credits per video. Plan accordingly if you’re on the free plan.
If you run out of free credits and don’t want to upgrade, Microsoft Designer (powered by DALL·E 4) is a solid free alternative for standalone image generation that you can then import into Canva. If you’re still building your full toolkit and want to see how Canva fits alongside other AI tools, I’ve tested everything side by side in my guide to the best AI tools for content creators in 2026.
How to Use Canva Magic Media to Generate Images Step by Step
Open a design → click Apps → search Magic Media → type your prompt → choose “Image” → select a style → click Generate. Your image appears in about 10 seconds and can be dragged directly into your design. The key to good results is writing descriptive, specific prompts with a style reference included.
This is the core skill — and honestly the most important part of learning how to use Canva Magic Media properly. Let me walk through it exactly.
Step 1: Open Your Canva Design
Go to canva.com and open an existing design or start a new one. Pick your format first — Instagram Post (1080×1080), YouTube Thumbnail (1280×720), LinkedIn Banner, whatever you need. If Instagram is your main platform, it’s worth reading my guide on AI tools for Instagram Reels that actually go viral alongside this one — the visual and caption workflow I cover there pairs directly with what you’re building here. The generated image will be easier to use if your canvas is already the right size.
Step 2: Open the Magic Media Panel
Click “Apps” in the left sidebar. Search “Magic Media.” Click it. The panel opens on the left.
Step 3: Write Your Prompt
This is where most people go wrong — they type something vague like “business background” and get something generic.
Write descriptive prompts. Think: subject + setting + mood + style.
Weak prompt: motivational quote background
Strong prompt: minimalist flat design background with soft pastel gradients, abstract geometric shapes in blush pink and cream tones, suitable for an Instagram quote post, clean and modern
The more specific you are, the less time you waste regenerating. This is the single biggest thing most people get wrong when they first figure out how to use Canva Magic Media — they treat it like a Google search and then wonder why results look generic.
Step 4: Choose Your Style
Canva Magic Media offers style presets: Photo, Watercolor, Neon, Film, Geometric, Anime, Dreamy, and more. Pick one that matches your brand aesthetic before generating. This alone dramatically improves output quality because it guides the AI’s interpretation.
Step 5: Generate and Place
Click “Generate.” Four variations appear in about 10 seconds. Hover over any one to preview it larger. Click the one you want and it drops directly into your design canvas. Resize and position from there.
Step 6: Regenerate Smartly
If none of the four options work, don’t just click “Generate” again with the same prompt — you’ll get very similar results. Change one variable: adjust the style, add a color reference, or make the subject more specific. Small prompt edits produce meaningfully different outputs.
How to Use Canva Magic Design to Build Entire Layouts Instantly
Canva Magic Design generates a complete, ready-to-use design layout from a single text prompt or an uploaded image. Access it from the Canva homepage by clicking “Magic Design” or from inside the editor. It’s best used when you need a starting point fast and plan to customize from there — not as a finished product straight out of generation.
Before going further, it’s worth clarifying something that confuses a lot of creators who are learning how to use Canva Magic Media — Magic Design is a completely separate tool.
Magic Media generates a single image or video asset. Magic Design generates an entire layout — background, text placeholders, color scheme, visual hierarchy — all from one prompt.

Here’s how to use it:
From the Canva Homepage: Click “Magic Design” in the top navigation. Type a description of what you need — for example, “Instagram carousel post about morning productivity tips, clean minimal style, dark background.” Canva generates eight to ten complete layout options. Pick one, click it, and you’re inside a fully editable design.
From Inside the Editor: Click “Design” in the left sidebar, then look for the Magic Design icon (wand symbol) at the top of the templates panel. Enter your prompt there.
The honest limitation here: Magic Design outputs are template-heavy. They look polished but they don’t look unique. I use Magic Design to get the structural bones of a layout fast — proportions, hierarchy, spacing — and then swap out every visual element and font manually. Takes about five minutes but produces something that looks custom.
If you’re creating a series of posts that need to match each other visually, generate one Magic Design you like, customize it fully, then duplicate the canvas for subsequent posts. Far faster than starting from scratch each time.
How to Use Canva Magic Write for Social Media Captions
Canva Magic Write is Canva’s built-in AI writing tool. Access it by clicking on any text element in your design, then clicking the Magic Write wand icon that appears. You can use it to write captions, CTAs, headlines, and post copy directly inside Canva without switching to ChatGPT or another writing tool.
Most people don’t know Magic Write lives inside the text editor.
Here’s where to find it: click on any text box in your Canva design. In the text toolbar at the top, you’ll see a small wand icon labeled “Magic Write.” Click it. A prompt box opens.
Type what you need — Write a punchy 3-line Instagram caption for a post about morning productivity, casual tone, end with a question to boost comments — and Magic Write generates it directly into your text box.

Where this actually helps:
For Instagram captions with hooks, Canva Magic Write is genuinely faster than opening a separate writing tool. The output isn’t always perfect, but it’s a strong first draft that takes 20 seconds instead of five minutes.
For YouTube thumbnail text, use Magic Write to brainstorm five headline variations, then pick the sharpest one. Once you know how to use Canva Magic Media for the visual and Magic Write for the text, your whole thumbnail workflow lives in one place.
And if you want to take your YouTube content further, the AI trick that makes YouTube Shorts go viral overnight is the next logical piece of the puzzle once your visuals are sorted.
For LinkedIn posts being designed as graphics, having caption copy and visual in the same tool saves the constant app-switching that kills creative momentum.
The limitation to know: Magic Write doesn’t do long-form content well. It’s optimized for short, punchy copy — 50 to 150 words. For anything longer, ChatGPT or Claude is still the better tool. And if you’re a YouTuber who needs full script writing sorted, I’ve tested the 5 most powerful AI tools for writing YouTube scripts in 2026 — that’s the guide to read once you’ve got your visuals covered here.
How to Use Canva Magic Eraser to Clean Up Any Graphic
Canva Magic Eraser removes unwanted objects from photos and graphics using AI fill. Select an image in your Canva design, click “Edit Image” in the toolbar, then select “Magic Eraser” from the left panel. Brush over the element you want removed and click Erase. The AI fills the gap automatically using surrounding context.
This feature is genuinely underused — and most creators don’t even know it exists when they first learn how to use Canva Magic Media. It solves a very real problem.
Here’s the scenario I see constantly: a creator finds a nearly perfect stock photo, but there’s a logo, a watermark, or a background object that doesn’t fit their brand. Normally that means firing up Photoshop, or worse, finding a different photo entirely.
Magic Eraser handles this inside Canva in under 30 seconds.
Step-by-step:
- Select your image on the canvas
- Click “Edit Image” in the top toolbar
- In the left panel that opens, click “Magic Eraser”
- Adjust the brush size using the slider (larger for big objects, smaller for fine details)
- Paint over the element you want removed
- Click “Erase”
- Canva fills the removed area using AI — usually within 5 seconds
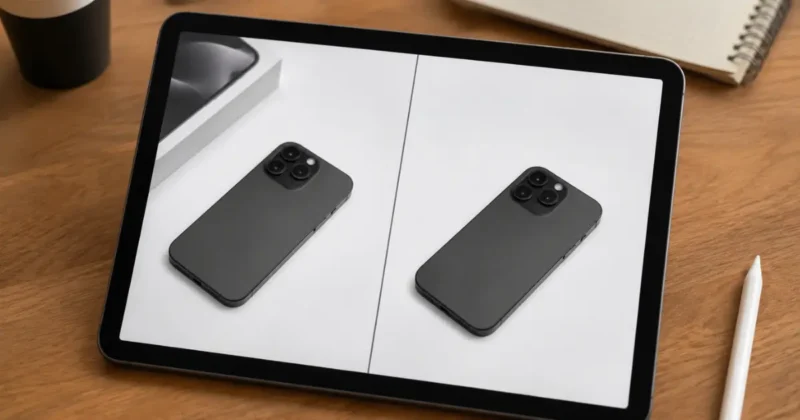
Where it works best: removing background objects from photos, erasing text overlays from images you want to repurpose, cleaning up product photos with distracting background elements.
Where it struggles: removing large or complex objects that make up a significant portion of the image. If you’re trying to remove a person from the center of a photo, the fill won’t look convincing. Stick to edges and background elements for clean results.
A closely related tool worth knowing: Magic Grab, also inside the Edit Image panel, lets you isolate and move individual elements within a photo. These two tools together — Eraser and Grab — cover about 80% of what most social media creators would previously need Photoshop for.
How Do You Use Canva for Social Media the Right Way?
The most effective way to use Canva for social media is to build a brand kit first (colors, fonts, logos), create master templates for each platform format, use Smart Resize to adapt designs across formats, and use Magic Media for fresh visuals rather than relying on Canva’s stock library that everyone else is also using.
Most people use Canva backwards.
They open a template, change the text, download, post. Repeat. Every post looks like a slightly different Canva template, and their feed ends up looking like everyone else’s who uses the same template pack.
Here’s a better system:
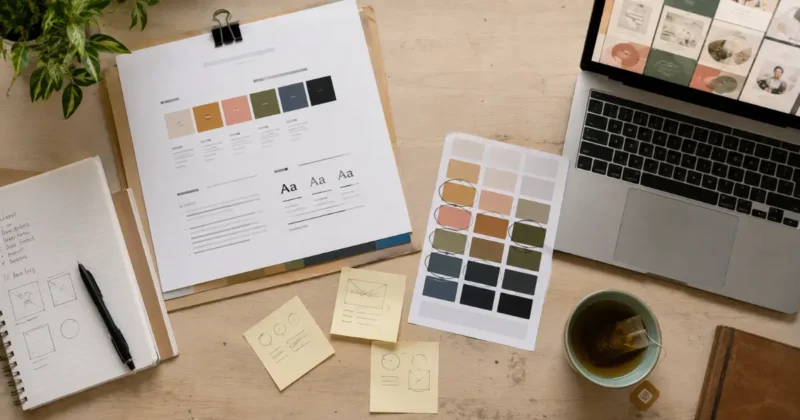
Step 1 — Build Your Brand Kit First Before designing anything, go to Canva’s Brand Kit (available on free and Pro, though Pro has more slots). Upload your logo, set your three primary brand colors using hex codes, and set your two fonts — one for headlines, one for body text. Every design you make from now on will have these accessible with one click.
Step 2 — Create Master Templates, Not One-Off Designs Design one perfect Instagram post layout. One perfect YouTube thumbnail layout. One perfect LinkedIn graphic layout. These become your master templates — and if you’re specifically building a YouTube channel without showing your face, a consistent thumbnail template is even more important. The whole system is something I break down in my guide on building a faceless AI YouTube channel to 100K in 2026.
Duplicate them for every new piece of content and only change the text, image, and specific color accents. Your feed instantly looks cohesive.
Step 3 — Use Magic Media for Unique Visuals Once you know how to use Canva Magic Media properly, stop reaching for the same stock images everyone else is using. Generate custom visuals that match your exact brand style and your feed immediately starts looking different from everyone else’s. Even one original AI-generated visual per post makes a difference in how unique your feed looks.
Step 4 — Use Smart Resize Aggressively Design once, resize everywhere. Canva’s Smart Resize (Magic Resize on Pro) lets you take one completed design and instantly adapt it to Instagram Story, Twitter/X post, Pinterest pin, and LinkedIn banner — all in one click. This is the single biggest time-saver in Canva for creators posting across multiple platforms.
What Are the Best Canva AI Features Most Creators Miss?
Beyond Magic Media and Magic Write, the most underused Canva AI features are Background Remover (instant subject isolation), Magic Animate (adds AI-powered motion to static designs), Magic Morph (transforms design elements into illustrated textures), and the AI-powered Translation feature that localizes your design copy into other languages.
Let me run through these quickly because they’re genuinely worth knowing:
Background Remover: Click any photo → Edit Image → BG Remover. Removes the background in under three seconds. Use this to isolate product shots, create transparent-background logos, or pull a subject from a photo and layer it over a custom Canva background. This alone used to require separate tools.
Magic Animate: Select any element or your whole design → Animate (in the toolbar) → Magic Animate. Canva’s AI analyzes your design and applies a movement style that matches the layout. Great for Instagram Reels cover frames and LinkedIn video posts where a subtle animated version of a static design performs better than a static image.
Magic Morph: Select a text element or shape → Effects → Morph. Type a texture description — “crumpled paper,” “liquid metal,” “soft moss” — and Magic Morph applies that texture style to your design element. Niche feature, but genuinely useful for creating standout typographic designs.
Translate: If you create content in multiple languages or want to test posts for a bilingual audience, Canva’s AI translation feature localizes all the text in a design to a target language while preserving the layout. Find it under Edit → Translate.
None of these features require Canva Pro. They’re all available on the free plan with the standard credit limits.
Advanced Tips: How Do You Get Better Results from Canva Magic Media?
Better Magic Media results come from three practices — writing style-specific prompts that reference visual aesthetics rather than just subjects, using the style presets deliberately rather than leaving them on default, and iterating with small prompt changes rather than complete rewrites between generations.
After testing hundreds of generations and teaching other creators how to use Canva Magic Media, here’s what I’ve actually found works:
Tip 1: Lead With the Visual Style, Not the Subject
Most people write: a woman working on a laptop
Write this instead: flat vector illustration style, warm coral and ivory color palette, a woman sitting at a minimal desk working on a laptop, soft shadows, modern editorial aesthetic
The subject is the same. The output is completely different — and far more usable.
Tip 2: Use the Style Presets as a Starting Point, Then Prompt for Modifications
Select “Watercolor” as your style preset but then add with sharp clean edges and high contrast to your prompt. You get a hybrid output that’s more distinctive than either pure preset. Mixing preset + contradictory prompt modifier is a quick way to get outputs that don’t look like everyone else’s Magic Media generations.
Tip 3: Save Your Best Prompts
Canva doesn’t have a native prompt history yet. Keep a simple running doc — Google Keep or Notion works fine — of prompts that produced results you loved. Reference those for future generations. Over time you’ll build a personal prompt library tuned to your brand’s aesthetic that nobody else has.
Tip 4: Generate for Texture, Not Just Subjects
Some of the best Magic Media use cases aren’t “generate a person” but “generate a background.” Prompts like abstract watercolor texture in sage green and warm cream, high resolution, seamless tile feel produce gorgeous backgrounds that make any text overlay pop. These abstract texture generations are easier for the AI to nail and more versatile than trying to generate specific scenes.
Tip 5: Combine Magic Media With Magic Eraser
Generate an image with Magic Media. Place it in your design. Use Magic Eraser to remove any element from the generated image that doesn’t fit. This two-step combo gives you much more control over the final output than pure generation alone.
FAQs – How to use Canva Magic Media
Q1: How do I use Canva Magic Media on the free plan?
Open any Canva design, click “Apps” in the left sidebar, search “Magic Media,” and type your prompt. Free users get 50 lifetime generation credits — enough to test the tool thoroughly before deciding whether to upgrade to Canva Pro.
Q2: What is the difference between Canva Magic Media and Magic Design?
Magic Media generates a single image or video asset from a text prompt. Magic Design generates a complete design layout — including background, text, and visual hierarchy — from a prompt. Use Magic Media for visuals and Magic Design when you need a full starting layout fast.
Q3: How do you use Canva Magic Eraser to remove backgrounds or objects?
Select your image, click “Edit Image” in the toolbar, choose “Magic Eraser” from the left panel, brush over the element you want removed, and click Erase. Canva’s AI fills the gap automatically. Works best on background objects and edges rather than large central subjects.
Q4: Is Canva AI good enough for professional social media graphics?
For social media content — Instagram posts, YouTube thumbnails, LinkedIn banners — Canva AI is production-ready when combined with a solid Brand Kit and custom prompts. It won’t replace Adobe Firefly 4 for commercial design work, but for daily content creation it’s fast, accessible, and free.
Q5: How do I use Canva Magic Write to create social media captions?
Click any text box in your Canva design, look for the wand icon labeled “Magic Write” in the text toolbar, click it, and type what you need. Magic Write works best for short punchy copy — Instagram captions, headline variations, and CTAs — rather than long-form content.
Final Thoughts: Is Canva AI Worth Using in 2026?
Here’s where I land after putting serious time into all of these features:
Canva AI isn’t trying to replace Midjourney or Adobe Firefly. It’s not competing with those tools for raw output quality.
What it’s doing — and doing well — is bringing AI generation to the place where most content creators already spend their design time. You don’t have to leave Canva to generate a visual, write a caption, remove a background, or resize for every platform. That workflow integration is the real value.
For a social media manager posting daily content, a blogger building custom graphics for every article, or a creator who needs to move fast without a dedicated design team — Canva AI in 2026 is legitimately useful. The free plan gives you enough to test it seriously, and Canva Pro at $15/month pays for itself if you’re doing more than a few posts a week.
Start with Magic Media and Magic Eraser. Get comfortable with those two. Then layer in Magic Write and Magic Design once you have a feel for what the AI outputs well.
And most importantly — build your Brand Kit first. Every Canva AI feature works better when the tool already knows your visual identity.
The best way to really get it is to just start. Now that you know how to use Canva Magic Media, open a new design, hit the Apps panel, and give it your first prompt. You’ll have a usable graphic in under five minutes — I’d bet on it.
If you’ve found a prompt style or Magic feature that works particularly well for your content, drop it in the comments — I’d genuinely love to see what other creators are building with this.