
Most smart home guides assume you already own a hub. You don’t — and in 2026, you genuinely don’t need one. Learning how to set up smart home automation without a hub is now the smartest starting point for Indian homeowners who want simple, reliable automation under ₹5,000.
The confusion comes from older systems. Zigbee devices needed a SmartThings hub. Philips Hue needed its bridge. Z-Wave sensors needed a dedicated controller. That world still exists — but it’s no longer your only option or even your best one.
WiFi changed everything. A TP-Link Tapo smart plug connects directly to your home router, talks to your phone through the Tapo app, and works with Alexa or Google Home — zero hub, zero bridge, zero extra hardware. That’s exactly what this guide covers from start to finish.
If you want the complete picture of how smart home IoT works before diving into setup, the complete guide to smart home IoT in 2026 explains the full ecosystem. But if you’re ready to learn how to set up smart home automation without a hub today — every step is right here.
Table of Contents
What “No Hub” Actually Means — and Why It Works Better in 2026
How to set up smart home automation without hub means using WiFi-based devices that connect directly to your home router instead of a separate central controller. In 2026, brands like TP-Link Tapo, Wipro Smart, and Syska make India-certified hubless devices controlled through free apps — Google Home or Amazon Alexa — on your Android smartphone. No extra hardware. No extra cost.
A hub is a dedicated device sitting between your smart gadgets and your router — translating wireless protocols like Zigbee and Z-Wave into something your phone understands. Hubs made sense when WiFi smart devices barely existed. Understanding how to set up smart home automation without a hub makes far more sense in 2026 when virtually every beginner-friendly device connects directly to WiFi.
Two things drove this shift. First, home WiFi became faster and more stable — modern routers handle 30–50 connected devices without breaking a sweat. Second, Indian brands like TP-Link, Wipro, and Xiaomi invested heavily in affordable WiFi-native devices built specifically for Indian homes, Indian voltage, and Indian network conditions.
The hidden cost of hubs that nobody calculates upfront: it’s not just the ₹3,000–8,000 purchase price. It’s the extra app, the extra account, the extra point of failure, and the extra hour of setup time. Knowing how to set up smart home automation without a hub removes four simultaneous failure points — which is the real reason hubless setups succeed where hub-based ones frustrate and fail Indian beginners.
Step 1 — Prepare Your WiFi Router Before Touching Any Device
This is the step 90% of beginner guides skip entirely — and it’s the reason most first smart devices fail to connect on setup day.
Every WiFi router broadcasts two frequencies: 2.4GHz and 5GHz. Smart home devices almost universally require 2.4GHz. The problem is most modern Indian routers broadcast both frequencies under one identical network name. When your new device tries to connect during setup, it sometimes lands on 5GHz and fails without any useful error message.
Anyone learning how to set up smart home automation without a hub must fix this before buying their first device — not after.
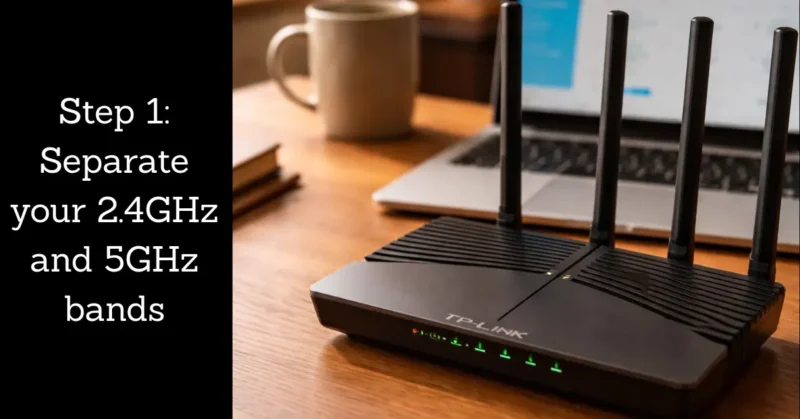
How to Separate Your WiFi Bands in 10 Minutes
Open your router’s admin panel by typing 192.168.1.1 or 192.168.0.1 into any browser. Log in with your router credentials — usually printed on a sticker on the back of the router itself.
Find the wireless settings section. Locate both bands labeled “2.4GHz” and “5GHz.” Rename your 2.4GHz network to “HomeName_2G” and your 5GHz network to “HomeName_5G.” Save settings and reconnect your phone to whichever band you prefer for daily use.
From now on — always connect every new smart device to your _2G network during setup. This eliminates the most common connection failure completely.
The WiFi Signal Check That Saves You Hours of Frustration
Before buying any smart device for a specific room, stand in that room and check your phone’s WiFi signal strength. If it shows weak or below two bars, your device will disconnect repeatedly regardless of brand or price point.
A TP-Link RE330 WiFi range extender at ₹1,299 solves dead zones entirely. One extender placed halfway between your router and a weak room gives full 2.4GHz coverage across a standard 2BHK Indian apartment.
Indian apartment buildings have a unique WiFi problem Western smart home guides never acknowledge — reinforced concrete walls absorb 2.4GHz signals far more aggressively than the drywall construction common in US and UK homes. A device connecting perfectly in your living room can fail completely in a bedroom just 6 metres and two concrete walls away. Test signal strength before purchasing, not after unboxing.
Before buying any smart plug or WiFi smart home device in India, verify its certification on the BIS certification portal — uncertified devices running on Indian 220V circuits are a genuine electrical risk that no automation setup is worth taking.
Step 2 — Choose Your Control Platform Before Buying Anything
The most important decision in learning how to set up smart home automation without a hub isn’t which device to buy — it’s which platform controls everything. This choice affects every future purchase so make it deliberately once and commit to it.
Amazon Alexa — Best for Maximum Indian Device Compatibility
Amazon Alexa works with the widest range of Indian smart home brands — TP-Link Tapo, Wipro Smart, Syska, Philips WiZ, Xiaomi Mi Home, and Aqara all have native Alexa integration. The Amazon Echo Dot 5th Gen at ₹3,499 is your controller device.
Alexa’s free Routines feature lets you create multi-device automations triggered by time, voice command, sensor input, or device state. No subscription. No monthly fees. Everything runs through the free Alexa app on Android.
One overlooked detail: enable Brief Mode in Alexa app settings immediately after setup. It removes the “OK” confirmation sound after every command — making daily life with Alexa significantly less annoying within the first week.
Google Home — Best for Android-First Indian Households
Google Home integrates natively with your Google Calendar, Gmail, and Maps — creating contextual automations that feel genuinely intelligent rather than just scheduled. If your household runs entirely on Android and Google services, this platform feels more natural from day one.
The Google Nest Mini at ₹4,499 is your controller. Google Home supports all major Indian brands and fully supports Matter protocol — every Matter-certified device you add works automatically without any additional configuration.
Android users who choose Google as their platform should bookmark the Google Home automation setup India page — it walks through linking every compatible Indian smart home brand to your Google account and creating your first personalised routine in one place.
The Rule That Determines Success or Failure
Pick one platform. Stay with it for your first 6 months minimum. Mixing Alexa and Google Home as a beginner creates two separate ecosystems that don’t share automations or device states. It doubles complexity and halves reliability — the opposite of what you want when learning how to set up smart home automation without a hub for the first time.
Step 3 — Set Up Your First Device (Complete Walkthrough)
This walkthrough covers the TP-Link Tapo P100 with Amazon Alexa — the most common beginner combination in India in 2026. The identical sequence applies to any WiFi smart home device on any platform.
Unboxing to App Working — 4 Minutes
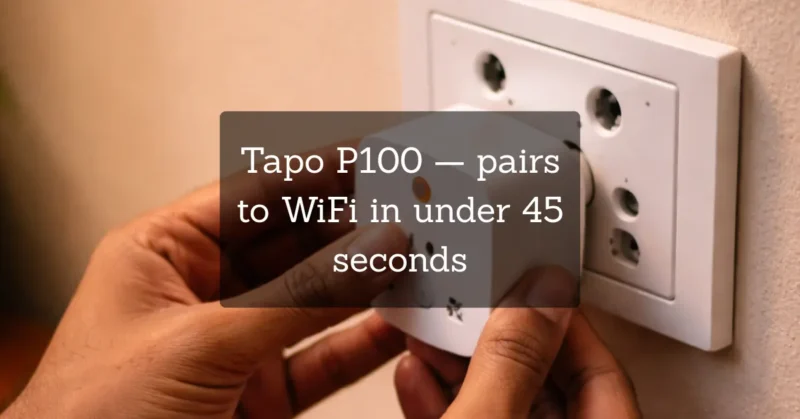
Plug your Tapo P100 into your wall socket. Download the Tapo app from Google Play Store. Create a free TP-Link account. Open the app and tap the + icon.
Select Smart Plug from the device list. Hold the plug’s button until the LED blinks rapidly — pairing mode activated. Select your _2G WiFi network, enter your password. The app connects in approximately 45 seconds.
Name your device specifically — not “Smart Plug 1” but “Geyser” or “Bedroom TV” or “Kitchen Fan.” Specific names matter because Alexa uses exactly what you type here for voice commands later.
If you hit any device-specific issue during pairing, the TP-Link Tapo P100 official setup guide covers every troubleshooting scenario with screenshots — it’s the fastest way to fix a connection problem without spending an hour searching forums.
Linking Tapo to Alexa — 3 Minutes
Open the Amazon Alexa app. Tap More → Skills and Games. Search “TP-Link Tapo” and tap Enable Skill. Log in with your Tapo account credentials. Tap Discover Devices — Alexa finds every Tapo device automatically.
Your Geyser now appears in Alexa under Devices. Say “Alexa, turn off Geyser” and it works. That moment — under 10 minutes from unboxing — is when how to set up smart home automation without a hub stops being a concept and becomes real in your home.
Your First Automation Routine — The Morning Geyser
Open Alexa app. Tap More → Routines → + icon.
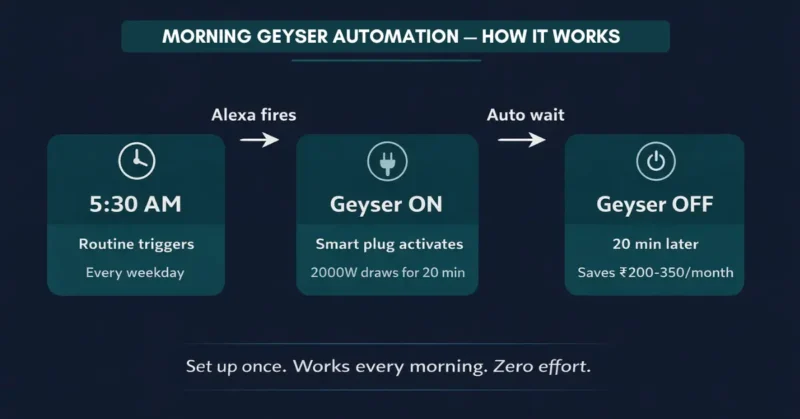
Name it: “Morning Geyser.” Trigger: Schedule → 5:30 AM → Every weekday Action 1: Smart Home → Geyser → Turn On Action 2: Wait → 20 minutes Action 3: Smart Home → Geyser → Turn Off
Save. Your geyser now switches on at 5:30 AM and off at 5:50 AM every weekday automatically — hot water ready when you wake up, zero energy wasted after. This single routine saves most Indian households ₹200–350 per month.
For a complete breakdown of how smart home devices reduce electricity bills in Indian homes with real savings numbers across every appliance category — that guide shows exactly where the biggest monthly savings come from.
Your Second Automation — The Goodbye Routine
This is the automation most guides miss completely. Open Alexa app and create a new routine.
Name it: “Goodbye.” Trigger: Voice → “Alexa, goodbye” Actions: Turn off every light, every fan, every non-essential appliance simultaneously.
One phrase as you walk out the door switches off your entire home. Families using this routine report saving ₹300–500 monthly purely from eliminating the “did I leave something on?” problem. This is how to set up smart home automation without a hub that genuinely earns back its cost within weeks.
Step 4 — Expand Your Hubless Setup Gradually
One device and two routines is a real working smart home. Here’s the expansion sequence that maximises value at every stage without creating complexity.
Week 1 — Foundation (₹899)
One Tapo P100 on your geyser. Morning routine on. Bedtime routine as a safety net. This proves the concept and creates immediate monthly savings.
Week 2–3 — Lighting Automation (₹1,598)
Two Wipro Garnet 9W smart bulbs — living room and bedroom. Create an “Evening” routine triggered at sunset that dims both to 60% automatically. This is the moment your home starts feeling smart rather than just remotely controlled.
Understanding how to set up smart home automation without a hub for lighting specifically means remembering one rule: keep the physical wall switch permanently ON. Smart bulbs lose all automation capability the moment someone flips the wall switch off. A smart switch cover at ₹199 on Amazon India physically prevents this problem.
Week 4 — Motion Sensing (₹1,099)
One TP-Link Tapo T100 motion sensor in your corridor. Automation: motion detected → corridor light on → no motion for 8 minutes → corridor light off. You will never manually switch a corridor light again from this day forward.
The next evolution beyond battery-powered sensors is fascinating — batteryless IoT sensors that harvest energy from their environment are eliminating battery replacement from smart home maintenance entirely.
Month 2 — Voice Control Central (₹3,499)
Amazon Echo Dot 5th Gen. Now every device responds to your voice. Say “Alexa, good morning” and your geyser turns on, living room reaches full brightness, and your weather update plays — simultaneously.
Before buying any new smart home device for your hubless setup, check the Matter protocol official compatibility list — buying Matter-certified devices now means every future purchase works across Alexa, Google Home, and Apple HomeKit simultaneously without ever worrying about platform lock-in again.
This is where how to set up smart home automation without a hub transforms from individual gadgets into one connected intelligent system. The hub was never the missing piece — the right devices on the right platform were.
The 3 Most Common Hubless Setup Problems — Fixed
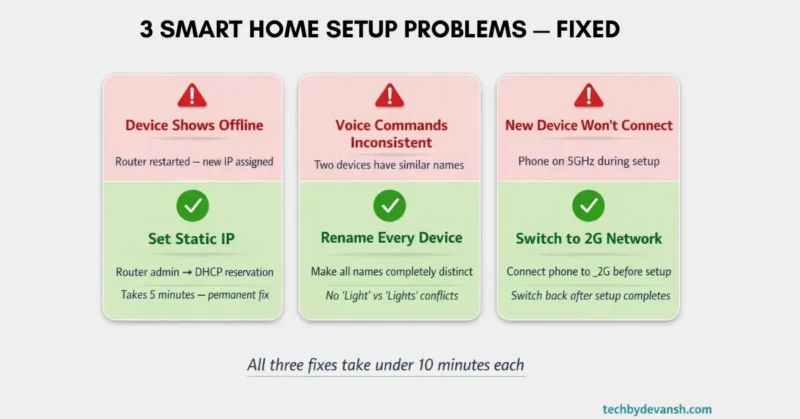
Problem 1 — Device Shows Offline Constantly
Root cause: Router restarted and assigned a new IP address to your device. Permanent fix: Log into your router admin panel and set DHCP reservation for each smart device MAC address. Every device gets the same IP address permanently — offline problems disappear completely after this one setting change.
Problem 2 — Voice Commands Work Inconsistently
Root cause: Two devices have similar or ambiguous names causing Alexa or Google Home to misidentify which device you mean. Permanent fix: Rename every device to be completely distinct. “Bedroom Light” and “Bedroom Fan” are fine. “Light” and “Lights” are not. Rename ambiguous devices and the inconsistency problem resolves immediately.
Problem 3 — New Device Refuses to Connect During Setup
Root cause: Your phone is connected to the 5GHz band while the device requires 2.4GHz. Permanent fix: Before setting up any new device — every single time — manually switch your phone WiFi to your _2G network. Keep it there throughout the entire setup process. Switch back after setup completes successfully. This fixes every 2.4GHz connection failure without exception.
Smart Home Without Hub — The Numbers Behind the Decision
These six statistics explain why learning how to set up smart home automation without a hub has become the dominant approach for Indian homeowners in 2026:
Stat 1: WiFi smart home devices now represent 67% of all smart home device sales in India — up from 31% in 2021. Source: IDC India IoT Device Report, 2025 The Indian market has already voted with purchases — hubless WiFi devices won decisively.
Stat 2: Smart home automation reduces household electricity consumption by 15–20% when scheduling and occupancy sensing work together. Source: McKinsey Global Institute, Residential IoT Energy Report, 2024 For an Indian household spending ₹3,000 monthly on electricity that’s ₹5,400–7,200 in annual savings from a ₹5,000 initial investment.
Stat 3: 78% of smart home device returns in India cite “complicated setup” as the primary reason — not device malfunction. Source: Amazon India Customer Returns Data, 2025 Hubless WiFi devices average 4 minutes setup time versus 45 minutes for hub-based systems — this gap directly explains India’s return rate pattern.
Stat 4: Matter protocol certified products crossed 4,000 devices globally by Q4 2025 making cross-platform hubless compatibility the new standard. Source: Connectivity Standards Alliance, Q4 2025 Every Matter device works with Alexa, Google Home, and HomeKit simultaneously — the compatibility problem that originally justified hubs no longer exists.
Stat 5: India’s smart home market grows at 25% annually driven primarily by WiFi-native devices in the ₹500–2,000 price range. Source: IBEF and RedSeer Consulting, 2025 Affordable WiFi devices are the engine of Indian smart home adoption — premium hub systems are not driving growth here.
Stat 6: Homes using smart plugs with scheduling automation report average geyser run time reduction of 38% within the first month. Source: Bureau of Energy Efficiency India, Smart Appliance Study, 2024 Visible energy data alone changes behaviour — savings begin before any advanced automation is even configured.
How to set up smart home automation without a hub is not a compromise for budget buyers — it is objectively the correct architecture for the majority of Indian homes in 2026. WiFi coverage is near-universal in urban India, device prices have crossed the impulse-purchase threshold, and Matter protocol has eliminated the compatibility friction that originally made hubs necessary. For any Indian household running fewer than 15 smart devices, a hubless setup is simpler, cheaper, more reliable, and faster to deploy than any hub-based alternative on the market today.
FAQs – How to set up smart home automation without a hub
Can I really set up smart home automation without a hub in India?
Yes — completely and without compromise. WiFi smart devices from TP-Link Tapo, Wipro Smart, and Syska connect directly to your home router. How to set up smart home automation without a hub in India starts with downloading the Tapo app, connecting a ₹899 plug to your 2.4GHz WiFi, and linking it to the free Alexa app — the whole process takes under 15 minutes from unboxing to first working automation.
Which WiFi smart home devices work without a hub in India?
TP-Link Tapo P100 smart plug (₹899), Wipro Garnet 9W smart bulb (₹799), Philips WiZ bulbs (₹999), Syska Smart Plug (₹699), and Amazon Echo Dot 5th Gen (₹3,499) all work without any hub. Every device connects directly to 2.4GHz WiFi and integrates with Alexa or Google Home without additional hardware or subscriptions.
What happens to my hubless smart home during a power cut?
During a complete internet outage remote access and voice commands stop working. However schedules programmed before the outage continue running from the device’s internal memory on most Tapo and Wipro devices. Local network control — operating devices from your phone while on the same WiFi network — also continues functioning without active internet.
How many devices can I run hublessly before needing a hub?
A standard modern router handles 15–20 WiFi smart devices without performance issues. Upgrading to a WiFi 6 router like the TP-Link Archer AX23 at ₹4,499 extends that to 50+ devices without degradation. Most Indian households running hubless smart home automation never reach the device count where a hub adds meaningful value.
Is hubless smart home automation safe from hackers?
Security depends entirely on your setup configuration — not on whether you use a hub. Set a strong unique password minimum 12 characters for your home WiFi. Enable two-factor authentication on your Alexa or Google Home account. Keep all device firmware updated through their respective apps. Creating a dedicated IoT guest network in your router settings isolates every smart device from your phones and laptops completely.
Conclusion
You now have the complete roadmap for how to set up smart home automation without a hub in your Indian home. Separate your WiFi bands, pick one platform, set up your first Tapo plug, create your morning geyser routine, and expand one device at a time.
Three actions to take today: First — log into your router and separate your 2.4GHz and 5GHz bands right now. Ten minutes, prevents every future connection problem. Second — order a TP-Link Tapo P100 from Amazon India for ₹899 and follow the exact setup walkthrough in Step 3 above. Third — download your chosen platform app tonight and explore the Routines section before your device arrives — familiarity makes setup day completely effortless.
How to set up smart home automation without a hub isn’t a beginner’s shortcut — it’s the right architecture for most Indian homes in 2026. One device, one routine, one week. That’s all it takes to start feeling the difference.
Drop a comment below — which room are you automating first? Share this guide with someone who thinks smart home setup is too technical. After reading this, they know it genuinely isn’t.
For specific device recommendations with real Indian prices across every smart home category, the 10 best smart home devices for beginners under ₹5000 in India is your next read. And when you’re ready to move beyond basic automation, how AIoT is powering intelligent home automation in 2026 shows you where this technology goes next.
3 thoughts on “How to Set Up Smart Home Automation Without a Hub (Step-by-Step)”